I picked up Paul McGowan’s book, Audiophile’s Guide: The Stereo – Unlock the Secrets to Great Sound, plus the companion discs to see what more I could learn about room setup. For most audiophiles, the listening room is the largest and most expensive component in their playback systems, often by an order of magnitude. Even small changes to set up will have a more significant impact than new speakers or other components. This is a difficult concept to grasp, but I’ve had over a dozen different pairs of loudspeakers in my room, and with each new model and design, I become more convinced that the room dominates the equation.

Paul begins his book with background context and helpful tips for assembling a balanced playback system, including considerations for various budgets and expectations. The meat of the book begins on page 94, Basic Setup, with a discussion of locations for the listening position and speakers. Paul’s grid approach is similar to Jim Smith’s in Get Better Sound; however, the width to depth ratios are different. Paul and Jim both emphasize getting the listening position right before fine-tuning speaker placement.
The Geometry of Placement
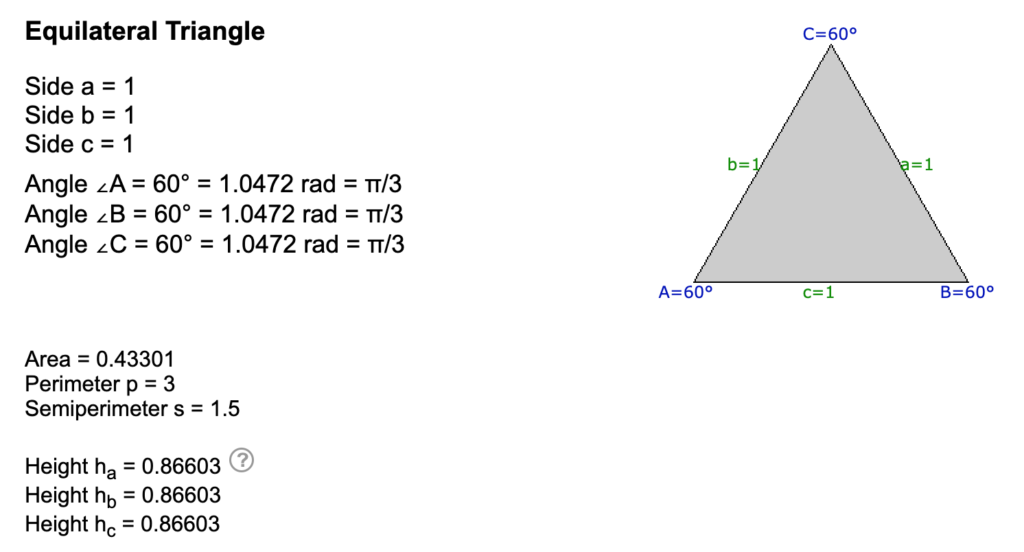
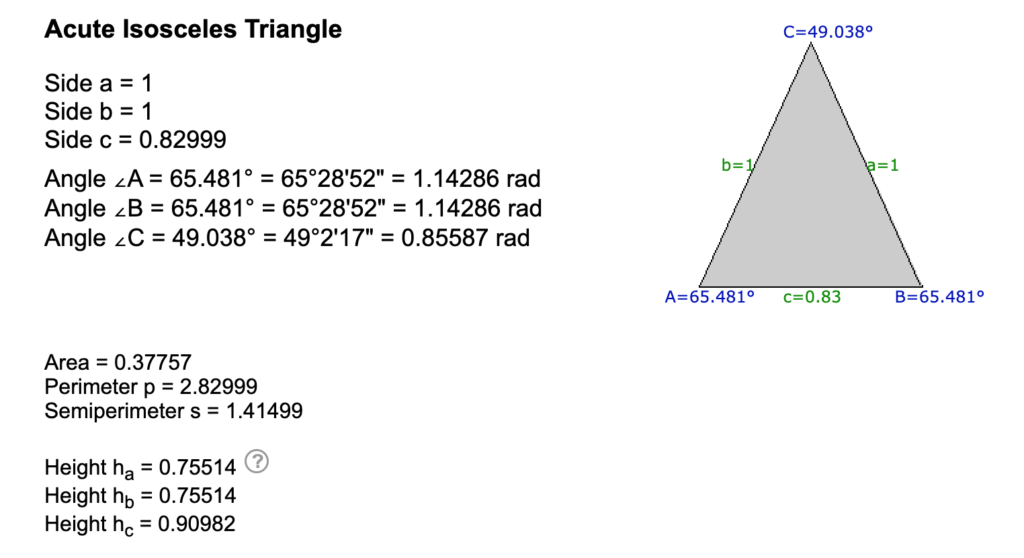
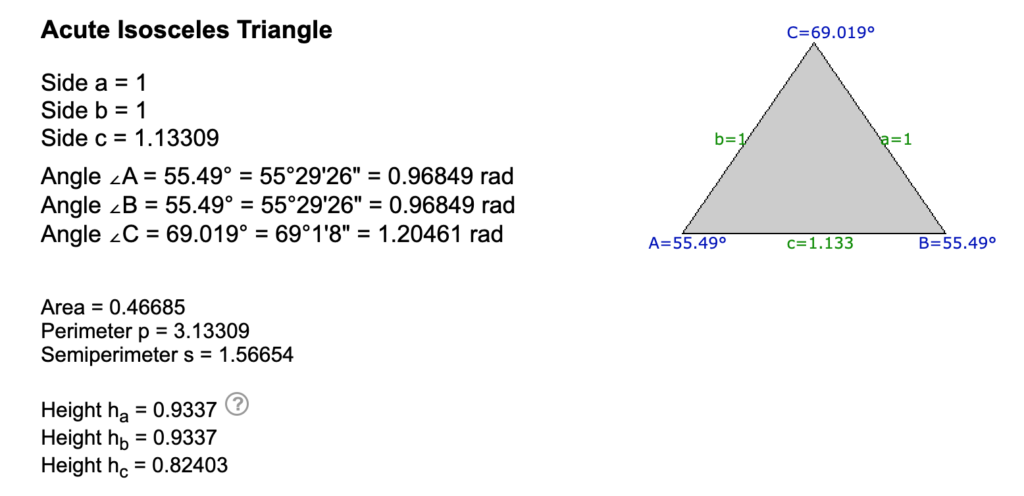
Mastering engineers and pro audio enthusiasts tend to advocate for speakers and listening positions that form an equilateral triangle. However, Paul seems to prefer wider speaker placement, while Jim Smith says he’s had better luck with the speakers placed closer together. The Jim Smith ratio calls for a tweeter-to-tweeter distance that’s 83% of that for ear-to-tweeter, while Paul’s preferred starting point has the speakers 11 ft apart and 8 ft from ears to the plane intersecting the two speakers. These are a little tricky to compare without doing some basic geometry. Thank goodness for the Triangle Calculator on Calculator.net:


Imagine the listening position at the top point of each triangle. Note how the relative width of the speakers and soundstage differs for each. While we all want a nice wide soundstage, too much width results in a diffuse image with poor focus, weak center-fill, and thin tonality due to reduced coupling of the midbass drivers. Since there’s no universal agreement, even among experts, Paul suggests that you just have to experiment on optimal angles. And to do that, you have to start somewhere, so pick one of these, set up your grid, and get to work!
Measurements vs. Listening
Ever since I learned the basics of its use, I’ve been a big fan of using Room EQ Wizard to measure my room for a better understanding what the system is doing. Despite the name, I exclusively use REW to gather objective data to explain what I’m hearing. Aural memory is imperfect, so visually comparing a series of plots is super helpful to evaluate changes as improvements or regressions. Paul points out that it’s equally important to gain proficiency at tuning the room by ear using familiar reference tracks. This is a skill that I hope to hone as I patiently work through Paul’s book.
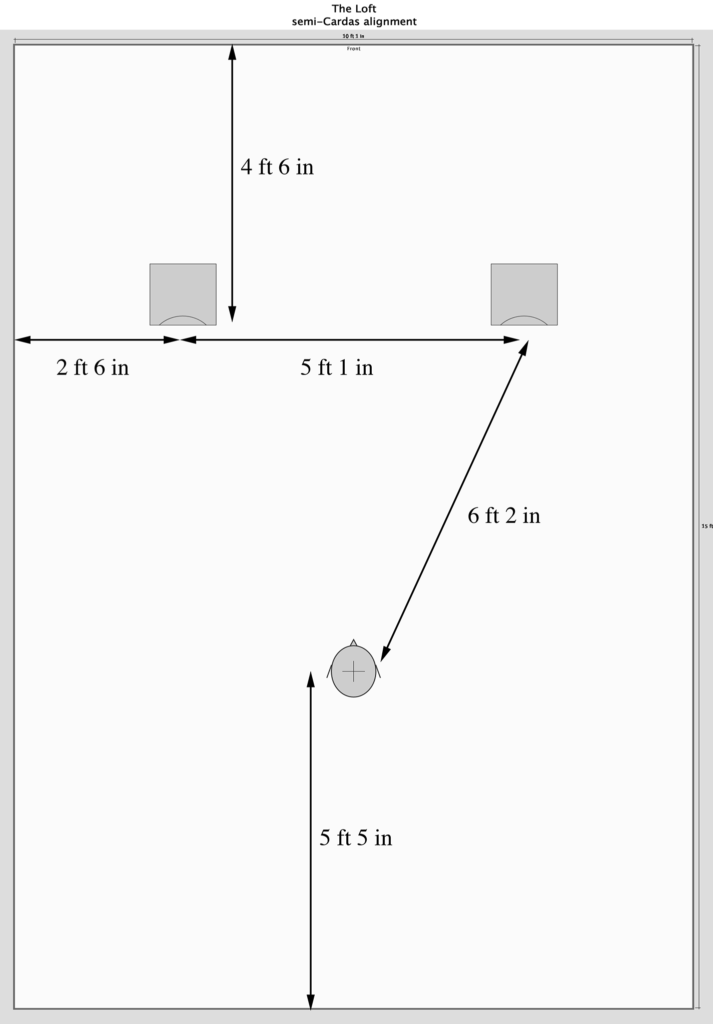
For this project, the room in question is a dedicated 2-channel listening space that I affectionately call “The Loft.” Its dimensions are 15 ft 6 in by 10 ft 1 in with an 8 ft ceiling. The rear half of the left wall is open to the floor below, but the front half of the room forms an enclosed “U” shape that is desirable for symmetrical wave launch. I have cleared the space, as Paul recommends. The diagram on page 102 of Paul’s book suggests an initial placement with the speakers eleven feet apart. Of course, that’s impossible in my 10.1 ft room, so I must make some adaptations.

Cardas suggests that the speakers should be pulled out from the rear wall at a distance that is 0.447 times the room’s width. In my case, that works out to about 4 ft 6 in. I’ll be starting with the “Jim Smith” triangle, which will place my ears a little over six feet from the tweeters–a quasi-nearfield arrangement. I’ll set up the grid with these starting points and follow Paul’s guide and test tracks to fine-tune. More to come…